How to Build a Power Rack Out of Wood: The Ultimate DIY Home Gym Guide
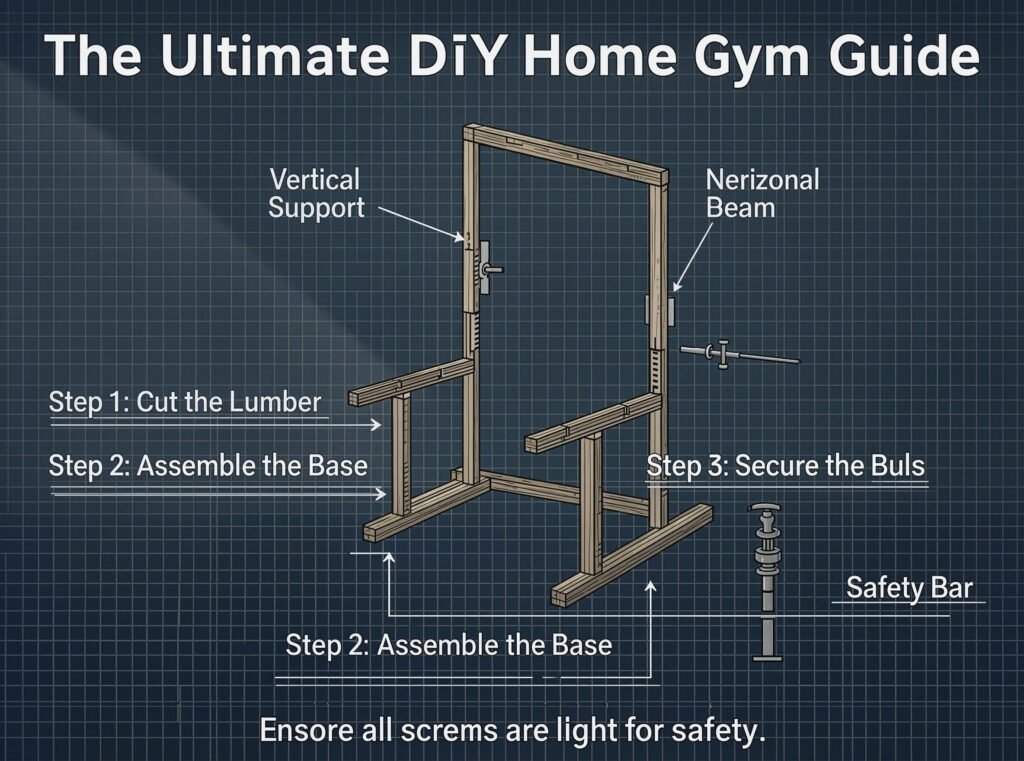
If you are setting up a home gym, you already know that equipment costs can spiral out of control fast. A high-quality commercial power rack can easily set you back $500 to $1,500 or more. But what if you could build a rack that is just as sturdy and safe for a fraction of the cost?
Enter the DIY wooden power rack.
Building a power rack out of wood is a highly rewarding weekend project. Not only does it save you a massive amount of money, but it also gives you the freedom to customize the dimensions to fit your specific space and height. When built correctly using the right techniques, a wooden rack is incredibly strong, capable of handling heavy squats, bench presses, and pull-ups.
In this comprehensive guide, we will walk you through exactly how to build a power rack out of wood. We will cover the materials, the cuts, the assembly, and crucial safety tips. Let’s get to building.
Why Build a Wooden Power Rack?
Before we measure the first board, you might be wondering: Is wood actually strong enough to hold heavy weight?
The short answer is yes, absolutely. Wood has been used in construction for centuries. The key is using the right type of wood, the right dimensions, and proper bracing.
Here is why a DIY wooden rack is a fantastic option:
- Cost-Effective: You can build a rock-solid rack for under $150.
- Customizable: You can build it to fit low ceilings, narrow rooms, or specific depths.
- Quiet: Wood absorbs shock better than metal, meaning reracking your weights won’t rattle your entire house.
- DIY Satisfaction: There is a unique sense of pride in lifting heavy weight on a rack you built with your own two hands.
The Golden Rule: Choosing the Right Lumber
Do not go to the hardware store and buy standard 2x4s if you want your rack to be safe. Standard 2x4s can warp and split under heavy loads.
For a safe power rack, you need Southern Yellow Pine (SYP). It is significantly denser and stronger than the white pine or spruce typically sold at big-box stores. Most home improvement stores (like Home Depot or Lowe’s) carry Southern Yellow Pine, but you have to look for it.
Instead of a traditional 4×4 post (which is actually 3.5″ x 3.5″ and prone to warping because it is cut from the center of the tree), the gold standard for DIY racks is using three 2×6 boards laminated (glued and screwed) together. This creates a massive, incredibly strong 5.5″ x 4.5″ post that resists warping.
For this guide, we will use the laminated 2×6 method for ultimate safety.
Materials and Tools You Will Need
The Wood List (Southern Yellow Pine):
- 10 pieces of 2x6x8 lumber (for the four vertical posts)
- 4 pieces of 2x4x8 lumber (for the base and top cross braces)
- 2 pieces of 2x6x8 lumber (for the pull-up bar and safety spotter arms)
- 1 piece of 2x4x8 lumber (for the J-cups/hooks)
Hardware & Supplies:
- 3-inch exterior wood screws (lots of them—get a 5lb box)
- 2.5-inch wood screws
- High-strength wood glue (like Titebond III)
- Wood stain or polyurethane sealer (to protect the wood from sweat and moisture)
- 1-inch metal pipes or thick wooden dowels (for pin adjustments, optional)
Tools:
- Circular saw or miter saw
- Drill/driver with a spade bit or hole saw
- Tape measure and carpenter’s square
- Speed square
- Level
- Clamps (at least four large ones)
- Sander or sandpaper
Step-by-Step Guide to Building Your Wooden Power Rack
Step 1: Prep and Cut Your Lumber
First, cut your 2x6s to length. The standard height for a power rack is about 82 inches (6 feet 10 inches), but adjust this based on your ceiling height and how tall you are. You need a total of eight posts cut to your desired height (two per corner).
Next, cut your 2x4s for the base and top crossbeams. A standard footprint is 48 inches wide by 48 inches deep.
- Cut four 2x4s to 45 inches for the base frame.
- Cut four 2x4s to 45 inches for the top frame.
Step 2: Laminate the Vertical Posts
This is the most important step for safety. Take three of your 8-foot 2×6 boards. Apply a generous, even layer of wood glue between the boards.
Stack the three boards on top of each other, making sure the edges are perfectly flush. Use your clamps to squeeze them tightly together. Drive 2.5-inch screws through the boards in a zigzag pattern every 6 to 8 inches to hold them permanently together.
Repeat this process until you have four massive vertical posts. Wipe away any squeezed-out glue with a damp rag. Let the glue cure for 24 hours.
Step 3: Assemble the Base and Top Frames
Lay two of your laminated posts parallel to each other on the ground, about 48 inches apart. Take two of your 45-inch 2×4 base pieces and screw them between the bottom of the posts, forming a rectangle. Use 3-inch screws and drive them in at an angle (toenailing) or drill pilot holes and drive them straight in.
Do the exact same thing for the top frame, attaching the 2×4 crossbeams near the very top of the vertical posts.
Step 4: Connect the Front and Back Frames
You should now have a front frame and a back frame. Stand them up (you will likely need a friend’s help for this).
Connect the front and back frames using the remaining 45-inch 2x4s on the left and right sides. You will attach one near the bottom and one near the top on both sides.
Crucial Safety Tip: Your rack will wobble right now. To fix this, you must add diagonal bracing. Cut four pieces of 2×4 at a 45-degree angle and attach them from the bottom of one post to the upper half of the adjacent post on all four sides. This will make the rack completely rigid.
Step 5: Add the Pull-Up Bar
Take your remaining 2×6 board and cut it to span the front of the rack (about 48 inches). Attach it horizontally between the two front posts at a height that allows you to do pull-ups without hitting your head on the ceiling. Use heavy-duty 3-inch screws and wood glue to secure it. You can round the edges of this board with a sander to make it more comfortable to grip.
Step 6: Drill Adjustment Holes
To adjust your J-cups (where the barbell rests) and safety bars, you need to drill holes in the front posts.
Measure and mark holes every 2 inches down the center of the front posts. Start about 12 inches from the floor and go up to your highest overhead press height. Using a 1-inch spade bit or hole saw, carefully drill straight through both laminated boards of the post. (Use a scrap piece of wood behind the post to prevent the wood from splintering when the bit breaks through).
Step 7: Build the J-Cups and Safety Bars
You will need to purchase 1-inch thick metal pipes (usually found in the plumbing aisle) cut to about 6 inches long. These will slide into the holes you just drilled.
To make the J-cups, cut a 2×4 into 6-inch blocks. Drill a 1-inch hole through the block so the metal pipe can slide through. Attach a 1×4 piece of wood to the front of the block to create the “hook” that holds the barbell. Wrap this hook in rubber matting or an old bike inner tube to protect your barbell’s knurling.
For safety bars, simply use long 1-inch metal pipes that slide all the way through both front posts.
Step 8: Sand, Seal, and Finish
Wood absorbs moisture, and a home gym is a sweaty place. Spend 30 minutes sanding down any rough edges. Apply two coats of polyurethane sealer or an outdoor wood stain. This protects your rack from sweat, humidity, and cracking, ensuring it lasts for years.
Crucial Safety Tips for Your DIY Wooden Rack
Building your own equipment means you are taking responsibility for your own safety. Please read these rules carefully:
- Always Use a Spotter or Safety Pins: Never squat or bench press inside a wooden rack without your safety bars in place. If you fail a lift, the safety bars must catch the weight, not the wood.
- Inspect Regularly: Every month, check the screws and the wood for any signs of cracking, splitting, or loosening. Tighten any loose screws immediately.
- Anchor It Down: If you are renting or on a concrete slab, use heavy-duty metal L-brackets to anchor the base of your rack to the floor. A rack that shifts during a heavy lift is dangerous.
- Do Not Overload It: A laminated Southern Yellow Pine rack is incredibly strong and can easily hold 500+ lbs. However, it is not a commercial rig rated for 1,000 lbs. Use common sense and progress your weights safely.
- Rerack Gently: Do not violently slam the barbell back onto the wooden J-cups. While the wood is strong, slamming weights will eventually cause stress fractures. Control your reps.
Final Thoughts
Learning how to build a power rack out of wood is one of the most practical and rewarding projects you can undertake for your home gym. By using Southern Yellow Pine, laminating your posts, and utilizing proper diagonal bracing, you can create a safe, rock-solid piece of equipment that rivals commercial racks in functionality.
For a fraction of the cost of a steel rack, you get a custom-built, highly durable setup that will support your lifting journey for years to come. Grab your tape measure, head to the lumber yard, and start building the home gym of your dreams today. Happy lifting!